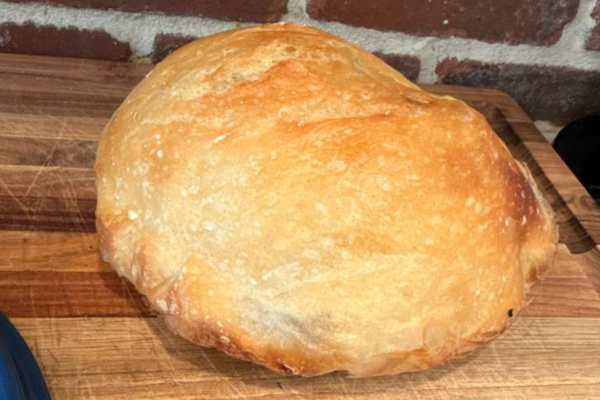
A simple homemade sourdough loaf with a golden crust, soft interior, and an easy step-by-step method for beginners.
This easy sourdough bread recipe is a simple, beginner-friendly way to make a beautiful homemade loaf. It uses just a few ingredients, yet the result feels special. With time, patience, and a few simple techniques, you can create a loaf with a crisp crust and soft interior right at home.
Although sourdough can seem intimidating at first, this method keeps things approachable. Instead of overcomplicating the process, it focuses on the basics that matter most. You mix the dough, let it rest, build strength with stretch and folds, allow it to rise, shape it, cold proof it, and then bake it in a hot Dutch oven.
Most importantly, this recipe is a reminder that homemade bread does not need to be perfect to be beautiful. Each loaf may look a little different, and that is part of the charm.
What Makes This Recipe Special
There is something helpful about seeing a recipe explained by the person who actually makes it. In the video below, Heather walks through her sourdough method and shares the process in a way that feels simple, warm, and approachable.
If you are new to sourdough, this is a great place to start. It gives you a better sense of the rhythm of the recipe, what each stage should look like, and how to move through the process with more confidence.
Why You’ll Love This Recipe
- Uses a straightforward ingredient list
- Great for beginners learning sourdough timing
- Gives you a crusty, golden loaf with a soft interior
- Uses cold proofing for better flavor and easier baking
- Includes steam-building tricks for a bakery-style crust
- Leaves room for imperfection and learning as you go
What You’ll Need
Ingredients
- 130 g active sourdough starter
- 350 g water
- 550 g total flour
- Up to 10% whole wheat flour, if desired
- 10 g salt
- 4 ice cubes for baking
Equipment
- Large mixing bowl
- Kitchen scale
- Cotton-lined bowl or proofing bowl
- Parchment paper
- Sharp knife or bread lame
- Dutch oven with lid
- Oven
- Instant-read thermometer, optional
Instructions
Step 1: Mix the Starter and Water
In a large bowl, combine the active sourdough starter and water. Mix until the starter loosens into the water.
Step 2: Add the Flour and Salt
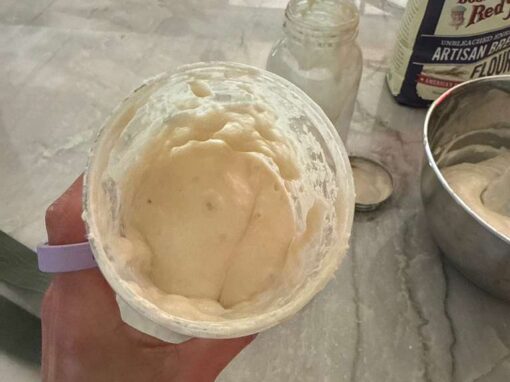
Add the flour and salt, then mix until the dough comes together and looks shaggy. It will look rough at this stage, which is completely normal.

Step 3: Let the Dough Rest
Cover the bowl and let the dough rest for 1 hour.
This gives the flour time to absorb the water and helps the dough begin developing structure before you start the folds.
Step 4: Do 4 Stretch and Folds
After the 1-hour rest, complete 4 rounds of stretch and folds, spacing them 30 minutes apart.
To do one round, wet your hands slightly, grab one side of the dough, stretch it upward, and fold it over itself. Turn the bowl and repeat until you have worked your way around.
This step builds strength without kneading. Below is a video I followed to fold the sourdough.
Step 5: Bulk Ferment
After the fourth stretch and fold, let the dough bulk ferment for about 6 hours.
You are looking for dough that appears puffier, smoother, and more alive. Timing can vary depending on your kitchen temperature, so use the look and feel of the dough along with the clock.
Step 6: Shape the Dough
Shape the dough into a round loaf, creating surface tension without pressing out too much air.
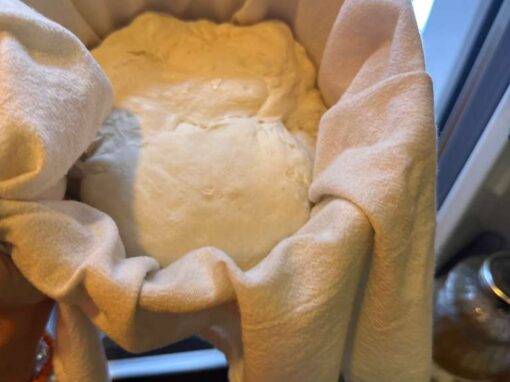
Step 7: Cold Proof
Transfer the shaped dough seam side up into a cotton-lined bowl. Place it in the fridge for at least 6 hours.
This cold proof helps the dough develop flavor and makes it easier to score before baking.
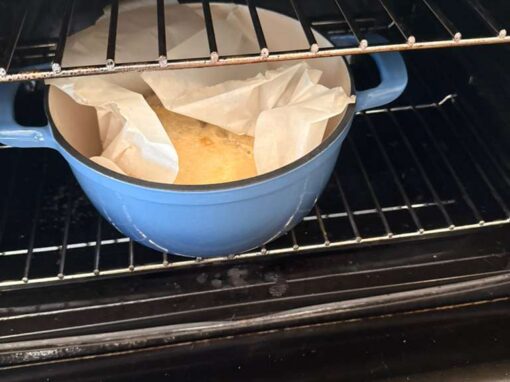
Step 8: Preheat the Dutch Oven
While the dough is still in the fridge, place your Dutch oven with the lid on into the oven. Preheat the oven to 500°F and let the Dutch oven heat for 45 minutes.
This step matters. A fully heated Dutch oven gives the loaf the hot environment it needs for strong oven spring.
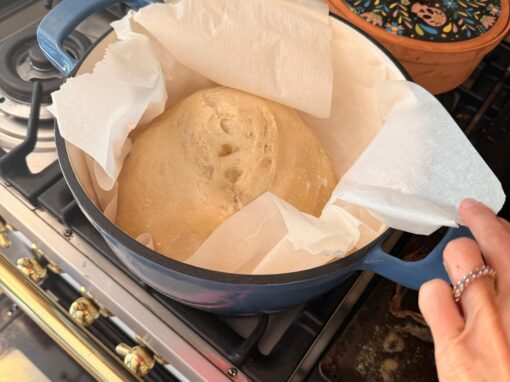
Step 9: Turn Out, Score, and Prepare for Baking
Remove the dough from the fridge and place it on parchment paper seam side down.
Score the dough off center at a 45-degree angle with a sharp knife or bread lame. Then place 4 ice cubes into the Dutch oven on the outside of the parchment paper. The ice creates steam, which helps produce a beautiful crust.
Step 10: Bake
Bake at 475°F for 25 minutes with the lid on.
Then remove the lid, lower the oven to 450°F, and bake for another 20 to 25 minutes, until the crust is golden and the internal temperature reaches 205 to 210°F.
That final uncovered bake is what gives the loaf its deeper color and crisp finish.
Step 11: Let It Cool
Transfer the bread to a cooling surface and let it cool fully before slicing.
This is one of the hardest parts, but it is important. The crumb continues setting after the loaf comes out of the oven. Slicing too early can make it gummy.
Tips & Variations
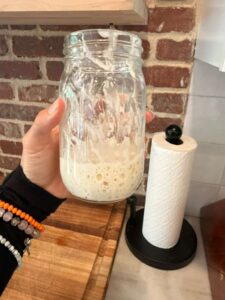
- Use active starter: Your starter should look bubbly and lively before mixing the dough
- Whole wheat option: Replace up to 10% of the flour with whole wheat flour
- Trust the shaggy stage: The dough does not need to look smooth early on
- Cold proof longer: A longer fridge proof can deepen flavor
- Steam boost: The ice cubes help create steam for a better crust
- Rustic is beautiful: Not every loaf will look the same, and that is part of the charm
Storage
- Store the loaf at room temperature in a bread bag, wrapped loosely, or in a container for up to 3 days
- For longer storage, slice and freeze for up to 2 months
- Reheat slices in the toaster or warm the loaf in the oven to refresh the crust
A Note On Imperfection
One of the details Heather shared alongside this recipe was a passage about imperfection and how flaws do not always diminish something. Sometimes they become part of what makes it meaningful.
That feels especially true with sourdough. A loaf might split in an unexpected place. The score might not open dramatically. The shape might lean more rustic than polished. None of that means it failed. Often, it means it is handmade in the best possible way.

Final Thoughts
This everyday sourdough bread is simple, beautiful, and deeply satisfying to make. It asks for patience, but not perfection. With a few basic ingredients and a little time, you get a loaf that feels homemade in the best possible way.
Some loaves may open more dramatically than others. Some may look a little more rustic. That is part of the process. Like anything made by hand, the beauty is often in the imperfection.
That feels especially true with sourdough. A loaf might split in an unexpected place. The score might not open dramatically. The shape might lean more rustic than polished. None of that means it failed. Often, it means it is handmade in the best possible way.